Learn how to manage users in the Merchant panel, including how to add new users, edit roles, and remove access when needed. Each user has specific rights that define what they can view and do, so keeping your user list up to date helps protect account access and ensure your team always has the right permissions.
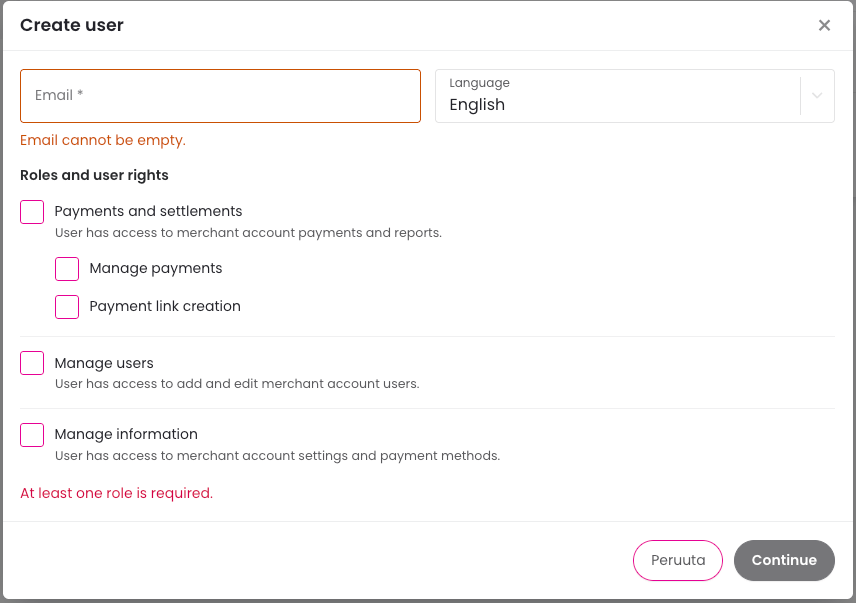
Users sign in to the Merchant panel with their email address. When you create a new user, the Payments and settlements role is selected by default but can be changed as needed. You can assign or remove additional rights to match each user’s responsibilities.
See the User rights and roles tab to determine what rights and roles to give users.
If you add an existing user to another merchant account, an invitation email is sent. The user is added only after they accept the invitation.
- Sign in to the Merchant panel.
- From the left-hand menu, select Users.
- Select Create user.
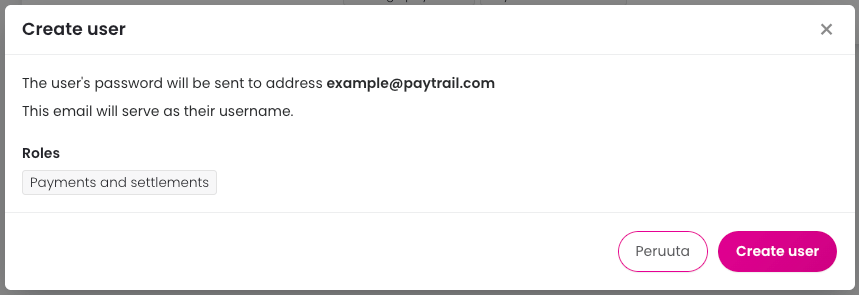
- Enter the user’s email address, choose the user’s language, set the permissions, then select Continue.
- Review the details and select Create user to confirm. To make changes, select Cancel.
The activation email is valid for 7 days. If the link expires, delete the user and create it again.
- Sign in to the Merchant panel.
- From the left-hand menu, select Users.
- Select Edit next to the user whose rights you want to change.
- Update roles and permissions as needed.
- Select Save user.
To update a main user or contact person, see how to update the main user or contact person.
- Sign in to the Merchant panel.
- From the left-hand menu, select Users.
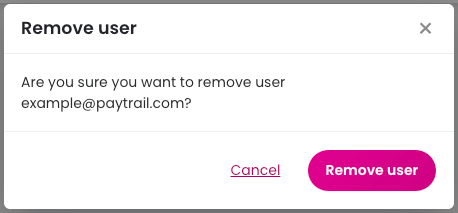
- Find the user and select Remove.

- In the confirmation window, select Remove user.
Removing a user revokes access to this merchant account. It does not affect access to other merchant accounts where the user has been added.
Each user has a specific role that determines what they can view and manage in the Merchant panel. In this section, you’ll find an overview of all available roles and what actions each role allows.
A user role that allows viewing payments and downloading settlement reports. For Omnichannel merchants, this includes both online and payment terminal transactions.
Manage payments
A user role that allows refunding payments.
Payment link creation
A user role that allows creating payment links. A user with this role cannot initiate refunds, transfer funds, or process other payments.
Initiating refunds*
A user role that allows creating refunds that require separate approval. A user cannot have this role and the Refund approval role.
Refund approval*
A user role that enables the approval of refunds that require it. A user cannot have this role and the Initiating refunds role.
*The Initiating refunds and Refund approval roles require activating the Refund approval setting under Settings. See instructions on how to activate the setting.
A user role that allows creating and editing merchant account users. The user can also download a user list in XLSX format that includes names, email addresses, and assigned roles.
A user role that allows managing merchant account details, settings, and payment methods.
A user role that allows managing the settings of payment terminals.
A user role that allows access to Paytrail MCP features and tools through compatible AI applications such as ChatGPT, Claude, Gemini, or LibreChat. Users with this role can use AI assistants to interact with merchant account functionality, such as creating payment links and viewing merchant information. Only grant this role to trusted technical users or integration partners.
Good to know
- Review your company’s users regularly and remove anyone who no longer works for your company.
- Ensure that there is always at least one user with the Manage users role.
- If the main user’s email address has changed, see instruction on updating the main user or contact person.
- If the person with the Manage users role cannot sign in to the Merchant panel, see instructions on resetting the password.